Setting up Visual Studio for the Tespuino
Introduction
You will need to do a little work setting up Visual Studio Code before you can program your Tespuino. Here are some instructions on how to do that. Also, feel free to reach out by email if you have any questions.
Install Visual Studio Code
If you don't already have it installed, download and install Visual Studio Code. Make sure that your install path does not have any spaces, or you will need to do these instructions all over again!
Download and install Visual Studio Code: Select Here
Set Up Espressif Add-On
IYou will need to set up the Espressif add-on to Visual Studio Code. This is where your path not having spaces matters. Follow these instructions carefully: Select Here
If you choose "Find ESP-IDF in your system" and you get an “IDF is invalid” message try specifying a version.
Use Repo Code
Go to our repo site, download the source code as a zip file, and extract it where you prefer on your machine: Select Here
Select the menu to download the repository (see fig)

Select Explorer Tab
Select the Explorer tab (see fig)

Select Open Folder
Select Open Folder button (see fig)

Select Open Folder from Repo
Select the project folder you downloaded from the repo, your Explorer tab should look like the fig. (see fig.)

Connect the Tespuino
Connect the Tespuino to a USB port on your machine
Select COM Port
Select the correct COM Port by select the COM selection on the bottom left-hand corner of the Visual Studio Code window. (see fig)

If you are using a Windows machine, you can verify the COM port by using Device Manager.
Select the windows button 🪟 on the keyboard or on the taskbar
On Windows 10 and above type, "Device Manager"
In Device Manager, look for COM ports, in this example, I had Tespuino on COM 8 (see fig)

Build
Build the project (see fig)
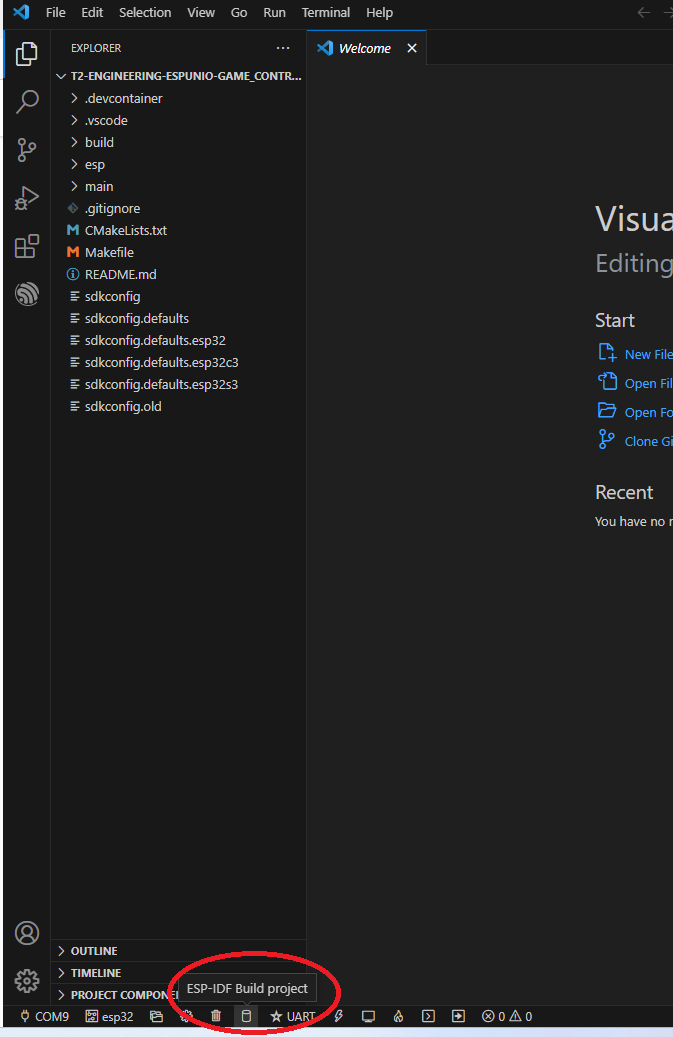
Wait for the build to complete, you should see the status in the terminal window
Select Device Model
You may need to change the target device. Select the ESP32 device selection on the bottom left-hand corner and let the extension detect the device. If you are using the ESP32s3, you will need to select ESP32s3 PROG (see fig.)

Flash Device
After successfully building the project, you may flash the device. You have two choices, 1. you can flash without monitoring or 2. flash with monitoring. In this example, I flashed with monitoring. (see fig.)
You will need to wait until the flash completes. The serial monitor will show you your progress and any errors.
Channel Error
There could be a conflict with Espressif and other add-ons. You may get a channel error. This may require you to do a fresh install of Visual Studio Code and completely wiping your add-on data. See this link on how to do that: Select Here